Wednesday 28 November 2018

Modifying the Initial Dashboard in Microsoft Dynamics 365

Modifying the Initial Dashboard in Microsoft Dynamics 365 for Operations

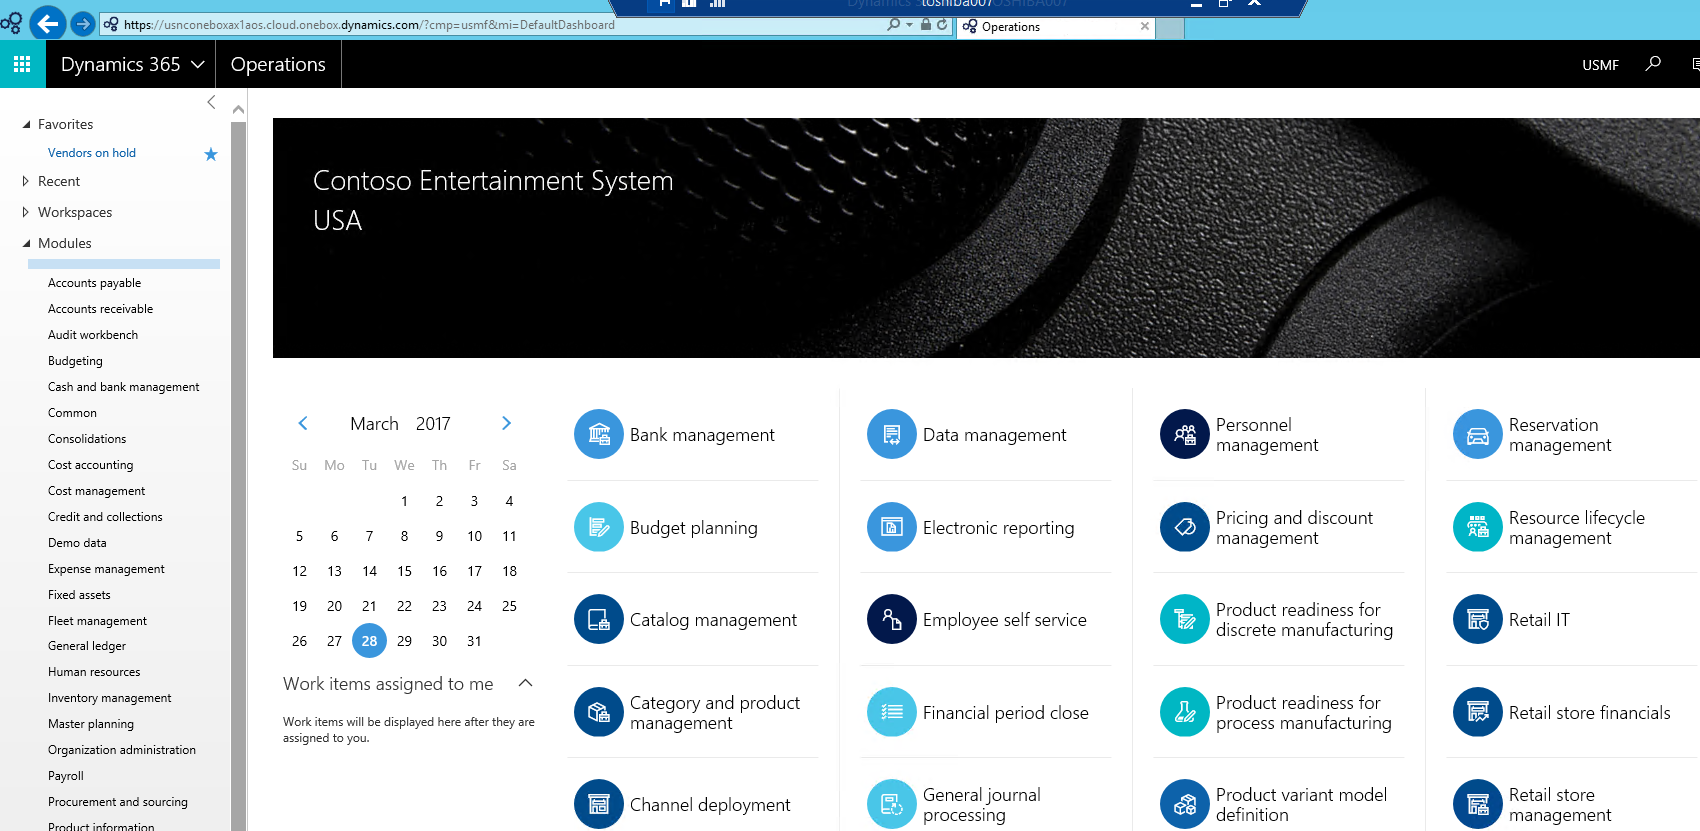
In D365 the first page displayed to the user is their dashboard.  The dashboard consists of a bunch of buttons like Bank management, Budget planning, etc.  For the system administrator who has access to everything in the system the dashboard looks like this:
Dynamics 365 Dashboard
In the Application Explorer, the dashboard is a menu, specifically the NavPaneMenu. The NavPaneMenu is like a standard menu in that it consists of submenus and menu items. It is different from other menus in that every menu item consists of a tile control pointing to a workspace. The workspaces used by the tile controls act as the entry points for modules.
Below is an extension I have created to the NavPaneMenu.  In my extension, I have added a tile control called BeckyTileTest.
NavPaneMenu
At runtime, your tile control will be displayed on the dashboard in alphabetical order using the label assigned to the tile control. The BeckyTileTest added to my dashboard has a label of Testing.
TileTestD365

Tuesday 20 November 2018

Set financial dimension mandatory on a form in AX 2012

.                                        Set financial dimension mandatory on a form


         Create a new Class with the name ‘CustTableEventHandler’

     Create a new Pre-or post-event handler method as shown below


3.       Rename newly created method as ‘custValidateWrite’ and write logic as shown below.

public static void custValidateWrite(XppPrePostArgs _args)
{
    DimensionAttribute                  dimAttr;
    DimensionAttributeValue             dimAttrValue;
    DimensionAttributeValueSetItem      dimAttrValueSetItem;
    CustTable                           custTable;
    RefRecId                            defaultDimension;
    boolean                             ret;
    ;

    custTable   = _args.getThis();
    ret         = _args.getReturnValue();

    defaultDimension    =   custTable.DefaultDimension;
   
    dimAttr             =   DimensionAttribute::findByName('Department');

    select firstonly RecId, DisplayValue from dimAttrValueSetItem
                where dimAttrValueSetItem.DimensionAttributeValueSet == defaultDimension
            join dimAttrValue
                where dimAttrValue.RecId == dimAttrValueSetItem.DimensionAttributeValue &&
                dimAttrValue.DimensionAttribute == dimAttr.RecId       &&
                dimAttrValue.IsDeleted == false;
   
    if (!dimAttrValueSetItem.DisplayValue)
    {
        ret     = checkFailed("Department must be specified.");
    }

    _args.setReturnValue(ret);
}


4.       Go to ‘validateWrite’ method of CustTable then right click & select New event handler subscription as shown below.

 
5.       Go to the properties of newly created event handler method & set the properties as shown below.


6.       Now try to create new customer without department then it throws a message saying that ‘Department must be specified.’